Stock is one of my favorite things to make. For one thing, you take something that was destined for either the trash or the compost and you get more food out of it before you toss it. For another, you save money. For a third, you reduce your trash from cartons or bouillon wrappers. And finally, you can control the final product for both flavor and nutrition. If you have the freezer space, I highly recommend it.
What scraps work best?
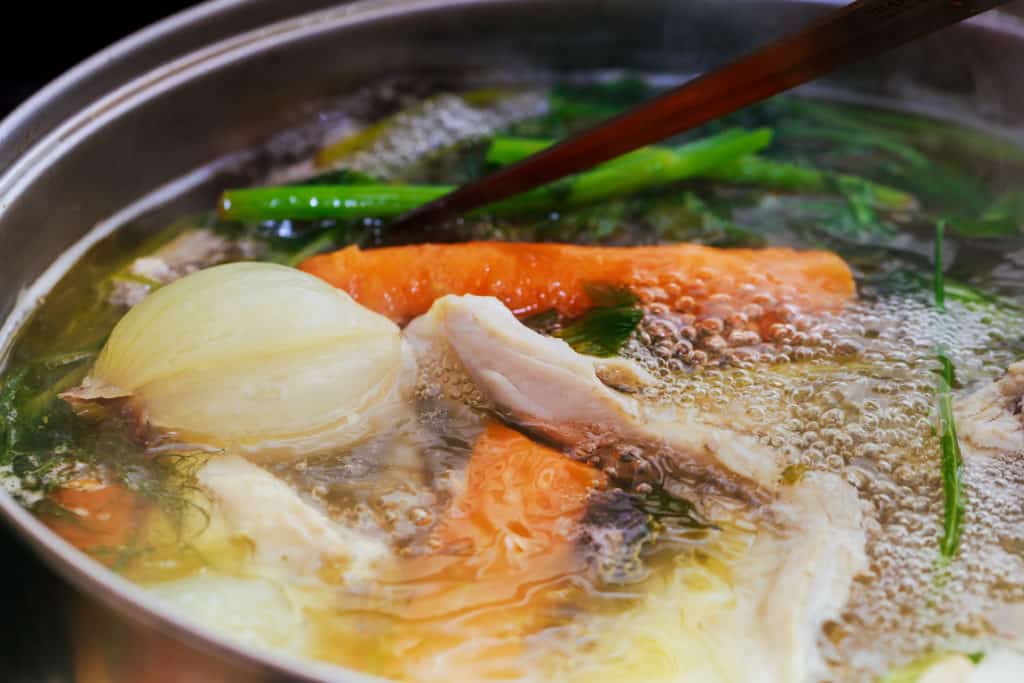
Your choice of scraps is going to set the tone for your stock. Honestly, if you like it, try it. I typically make a (mostly) chicken stock with a classic French mirepoix veggie base (carrots, celery, onion), but that’s because I always have scrap hanging around from these items. You can break stock scraps into two categories: meat and vegetable. Play with combining 1-2 meat options with 3-4 veggies. If you’re making vegetarian stock, use more veggies.
Meat Ideas
Keep in mind that meat fat is saturated fat, which means it’s good to limit in your diet. Chicken skin and beef trimmings add a lot of flavor, but they’ll also contribute to a final dish that would be less likely to earn Guiding Stars.
- Chicken bones (e.g., the carcass from a rotisserie chicken)
- Pork bones (raw or cooked)
- Beef bones
Vegetable Ideas
- Onion tops and skins (the skins add great color)
- Celery bottoms and leaves
- Carrot peels
- Leek ends
- Mushrooms (recommended especially for vegetarian stock)
- Garlic
- Pepper tops (not seeds and membranes, especially from hot peppers)
- Herbs (especially the classic bouquet garni mix: parsley, thyme, and bay, but you do you)
How do you save the scraps?
When I roast a chicken or buy a rotisserie chicken, I chuck the inedible bits into a freezer bag for stock day. Whenever I prep celery, onions, or carrots, I add the inedible bits to my vegetable scraps freezer bag. Both bags live in the freezer until stock day.
What do you do with the scraps?
I have tested out two processes for making stock: in a slow cooker and in an electric pressure cooker. The process is mostly the same. Only the time involved varies. In either case, I dump my scraps into my vessel of choice, add a splash of vinegar and a bit of salt, cover with water, and cook. I only use about a teaspoon of salt per batch, which is low, but I like to start low on salt in my dishes and let people add more if they want it.
Electric Pressure Cooker
The Soup/Broth setting on my pressure cooker goes for about an hour, which I find to be on the low side. I usually go for an hour and a half. Be mindful of safety with these things. Don’t overfill it. Do refresh your knowledge of the key safety warnings in your manual each time you use it.
Slow Cooker
I tend to let my slow cooker go for a full day or two making broth. It gets very dark and richly colored, and I like the flavor the process produces. This is a taste preference, though, so after the first 8 hours, taste it whenever you add water. Add water as needed. Safety note: meat scraps should be thawed before going into a slow cooker.
How do you store the stock?
After I’m done cooking the stock, I strain it immediately into a large metal bowl and stir frequently until it’s cool enough to handle. I portion it out into straight-sided glass jars, leaving an inch or more of headroom to allow for freezing. Freezing liquids in glass is a tricky proposition and you will lose the odd jar, even if you know what you’re doing. If you don’t want to risk dealing with glass breakage, you can save or buy plastic soup takeout containers. Some people have luck with freezer bags, but I’ve ended up with stock all over the place when I’ve tried that. Regardless of what you use, use a grease pencil to label your stock with the date and store it in your freezer.